AWS EC2 & cPanel (Part one)

WhoAmI => notes.sohag.pro/author
Disclaimer: This process can cost money. DO IT AT YOUR OWN RISK.
Pre-check List
cPanel account
AWS Account (Credit Card required)
System Requirement
| Operating system and version | Processor | RAM | Disk Space |
| Ubuntu 22.04 LTS 64-bit | Minimum: 1.1 GHz Recommended: 2 GHz | Minimum: 2 GB Recommended: 4 GB | Minimum: 20 GB Recommended: 40 GB |
Important Note
We do not provide an uninstaller. If you wish to remove our software, you must reformat the server.
Only install cPanel & WHM on a freshly-installed operating system.
You must log in to the server as the
rootuser in order to install cPanel & WHM. If you do not possessroot-levelaccess, contact your system administrator or hosting provider for assistance.We recommend that you use the cPanel & WHM installer, which installs all of the services that it requires. If you install services before you install cPanel & WHM, you will encounter compatibility issues.
— cPanel Docs
AWS EC2 Setup
Login to AWS Console: https://console.aws.amazon.com
Choose your nearest region from top right corner

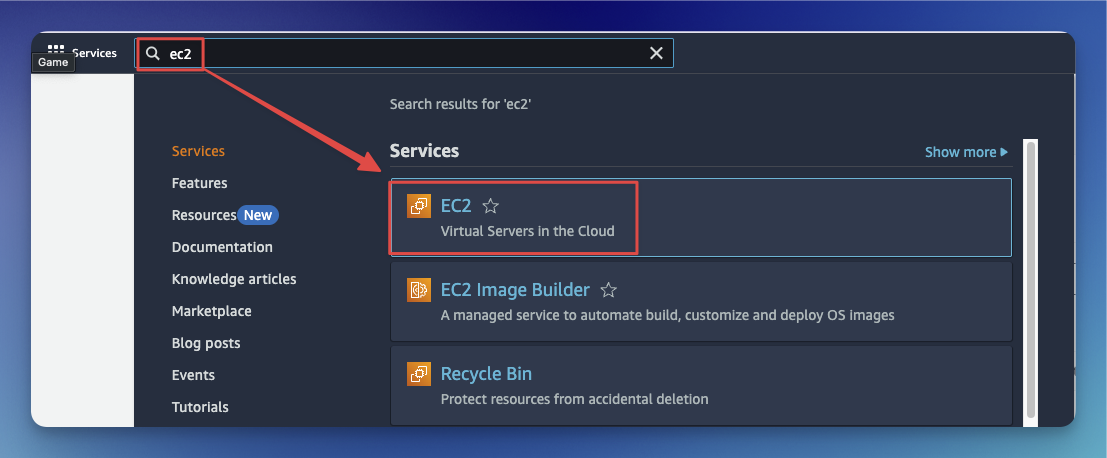
After selecting the Region, search for EC2 in the search box and click on EC2
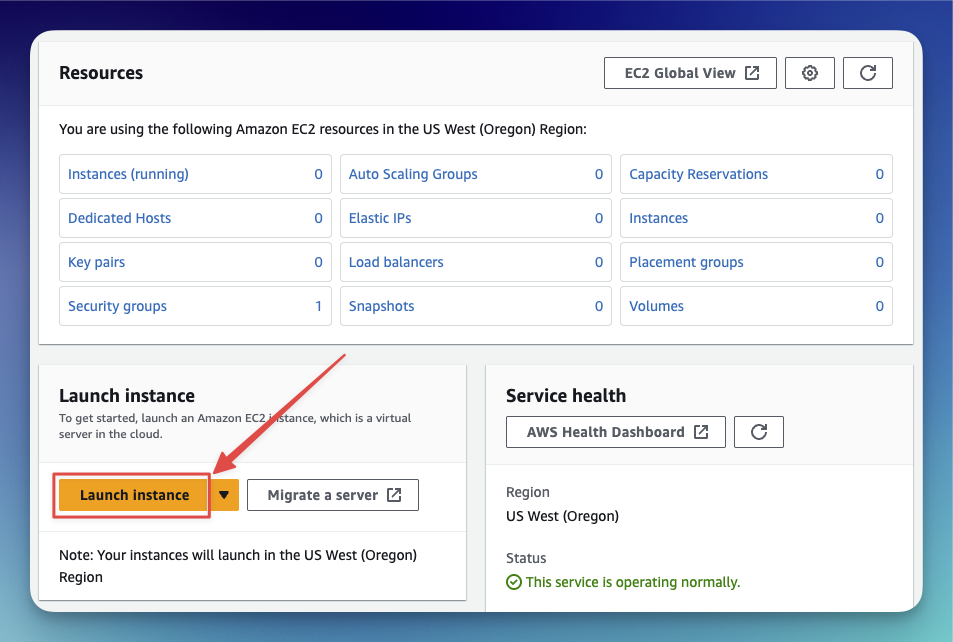
Look for “Launch Instance” button and Click it
Enter a name [1], OS[2]
Ubuntu, Version[3]22.04 LTS, Architecture[4]64-bit (x86)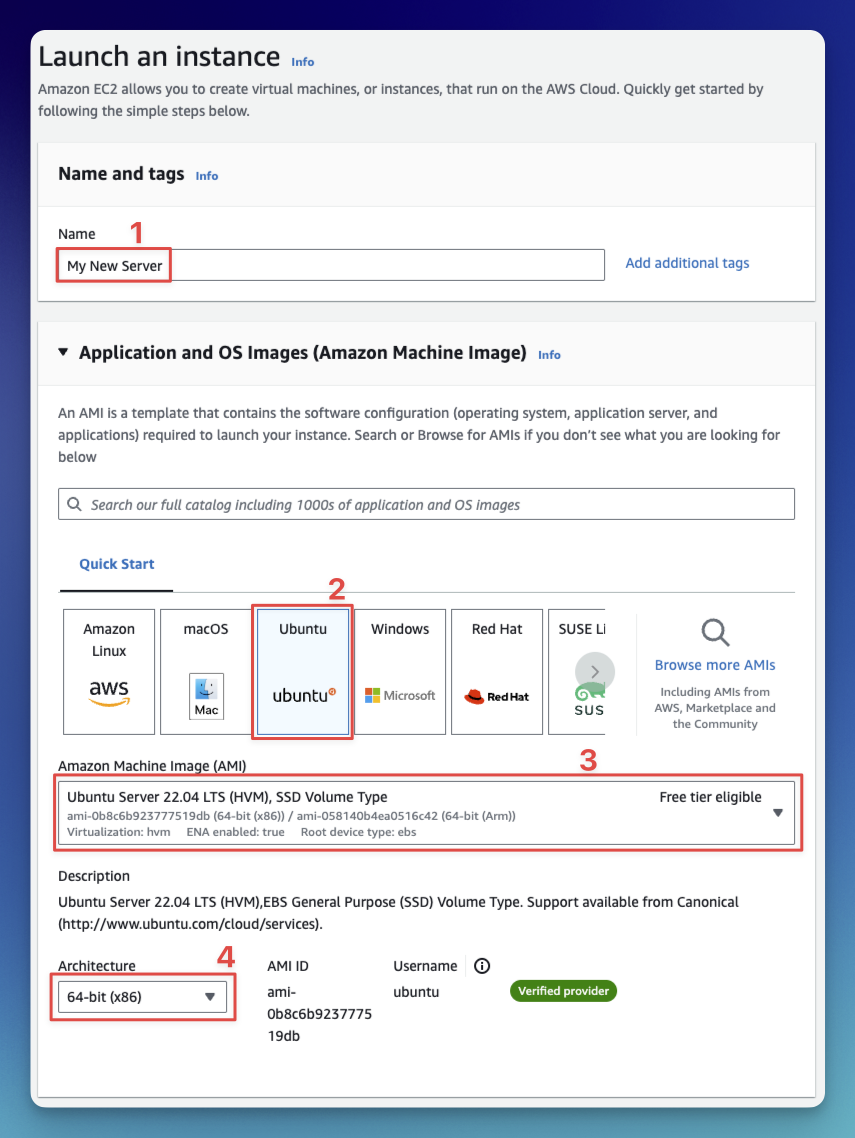
Now choose instance type
t2.mediumas we need 4GB of RAM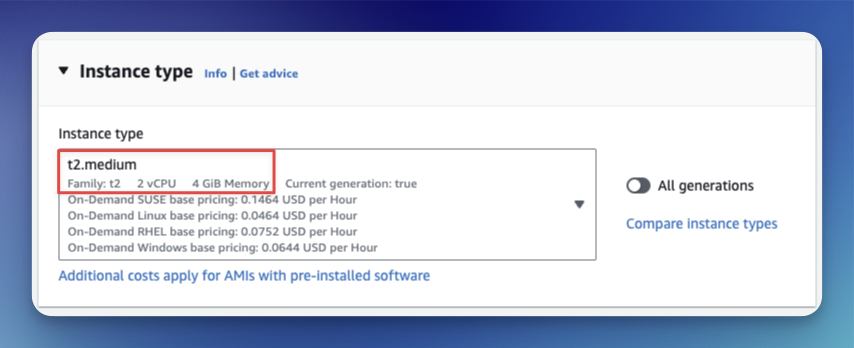
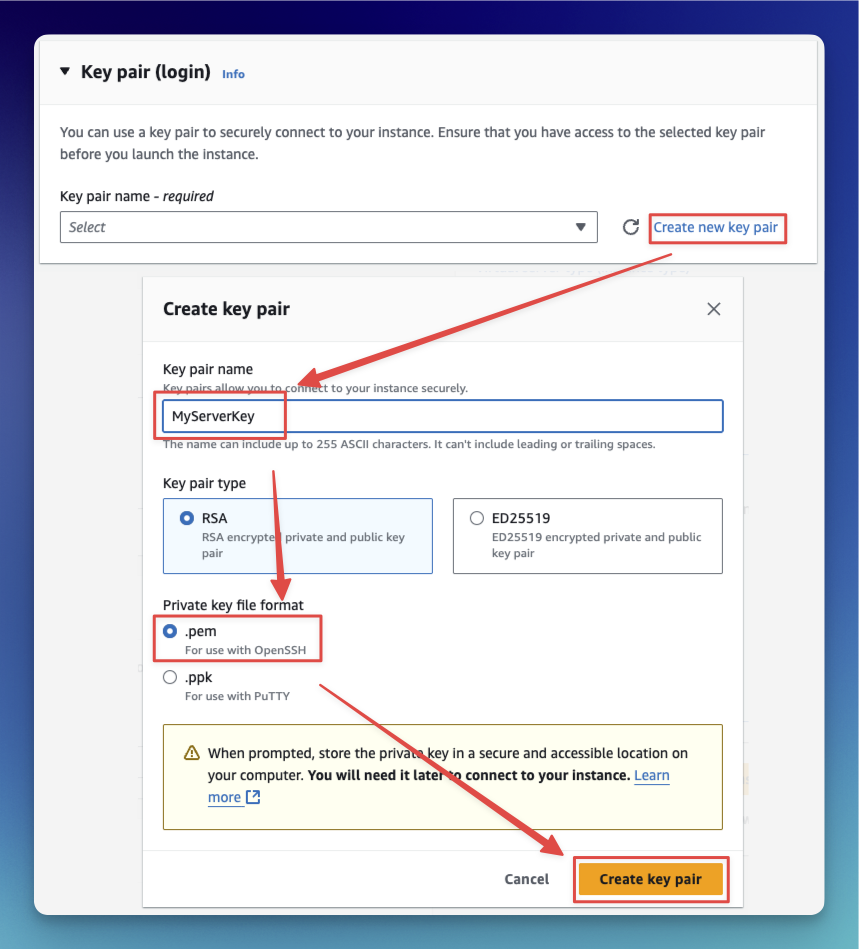
Now generate Key Pair to login into our VPS with SSH and Save it for future use.
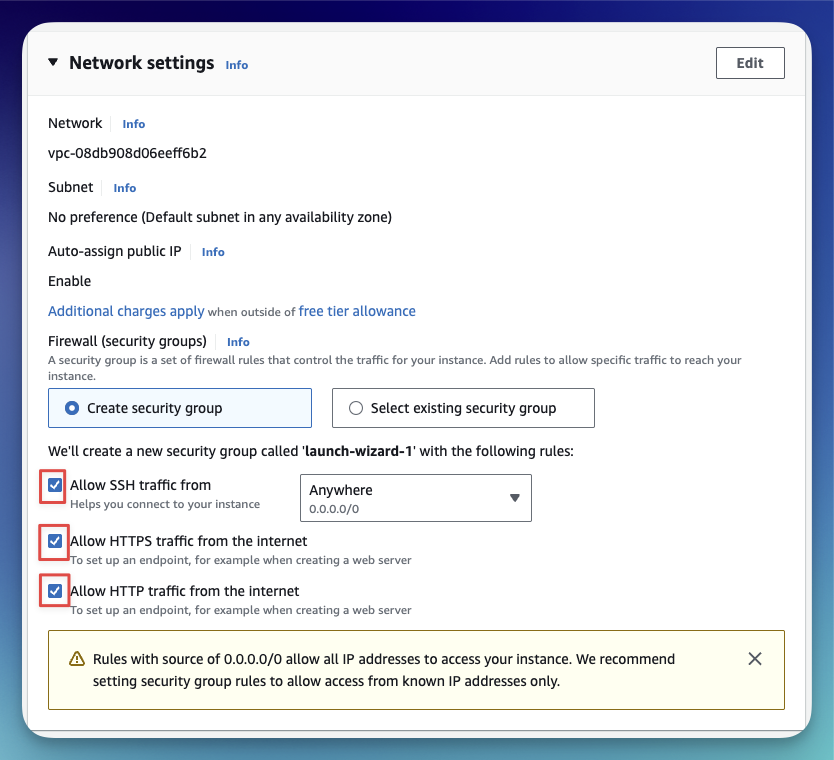
Now allow all traffic from the internet. And keep SSH Traffic from anywhere for now.
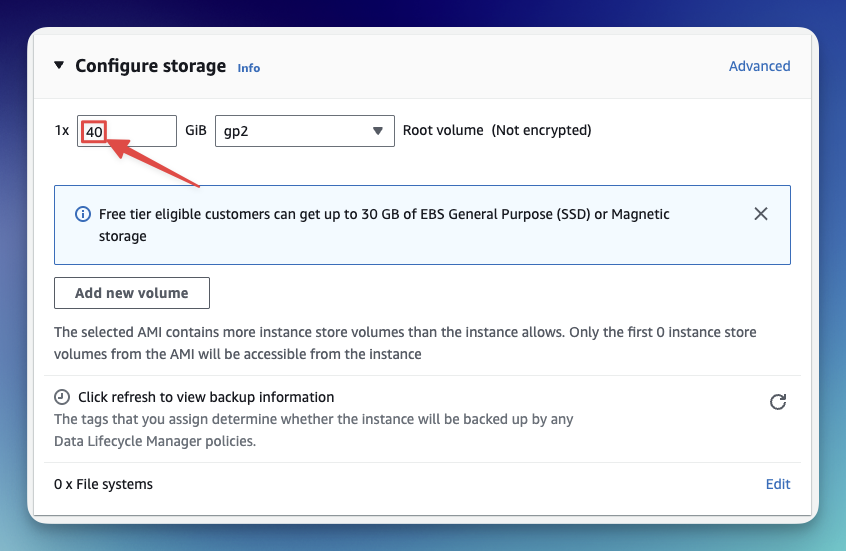
Add 40GB storage
Now our summary should look like this. Click Launch Instance

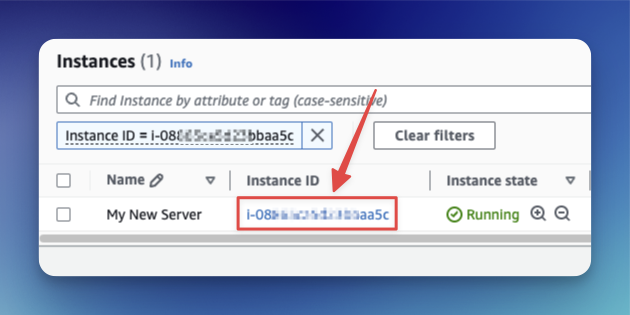
Once the instance is launched, it’ll look like this. Click on the instance ID to open the instance list.

Click on the Instance ID to open the instance control panel
This is how the control panel look

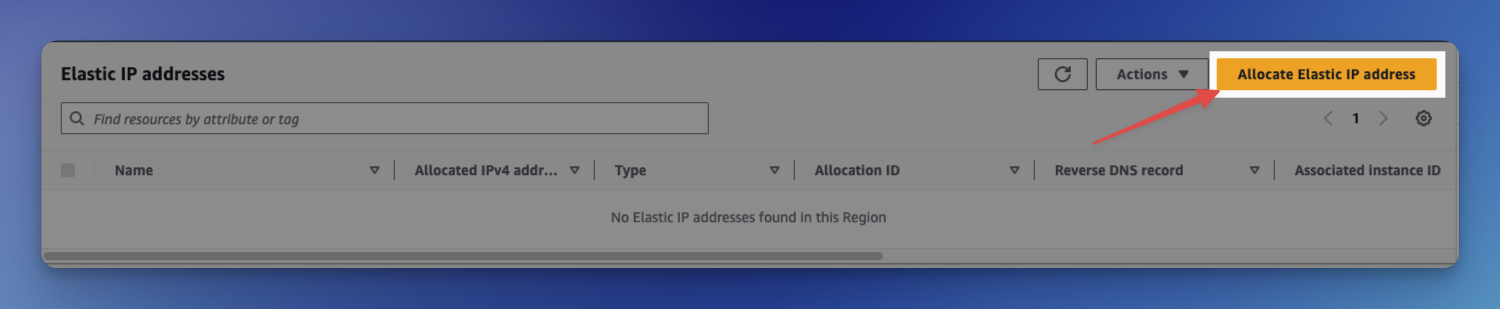
The public IP assigned here will be changed if the instance restarts. So we will add a elastic IP. Click on the “Elastic IPs” menu link under “Network & Security”

Now click on Allocate “Elastic IP Address”
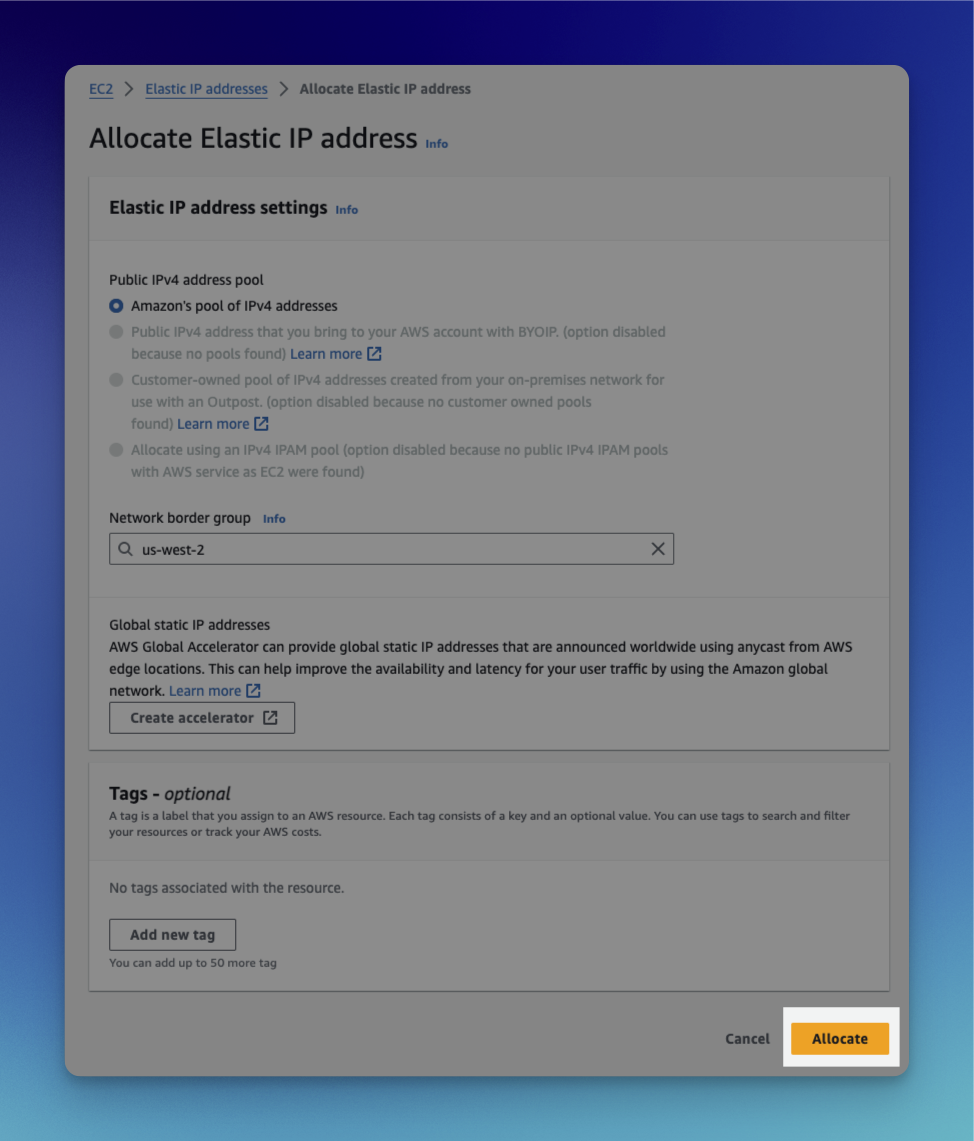
Now click on allocate
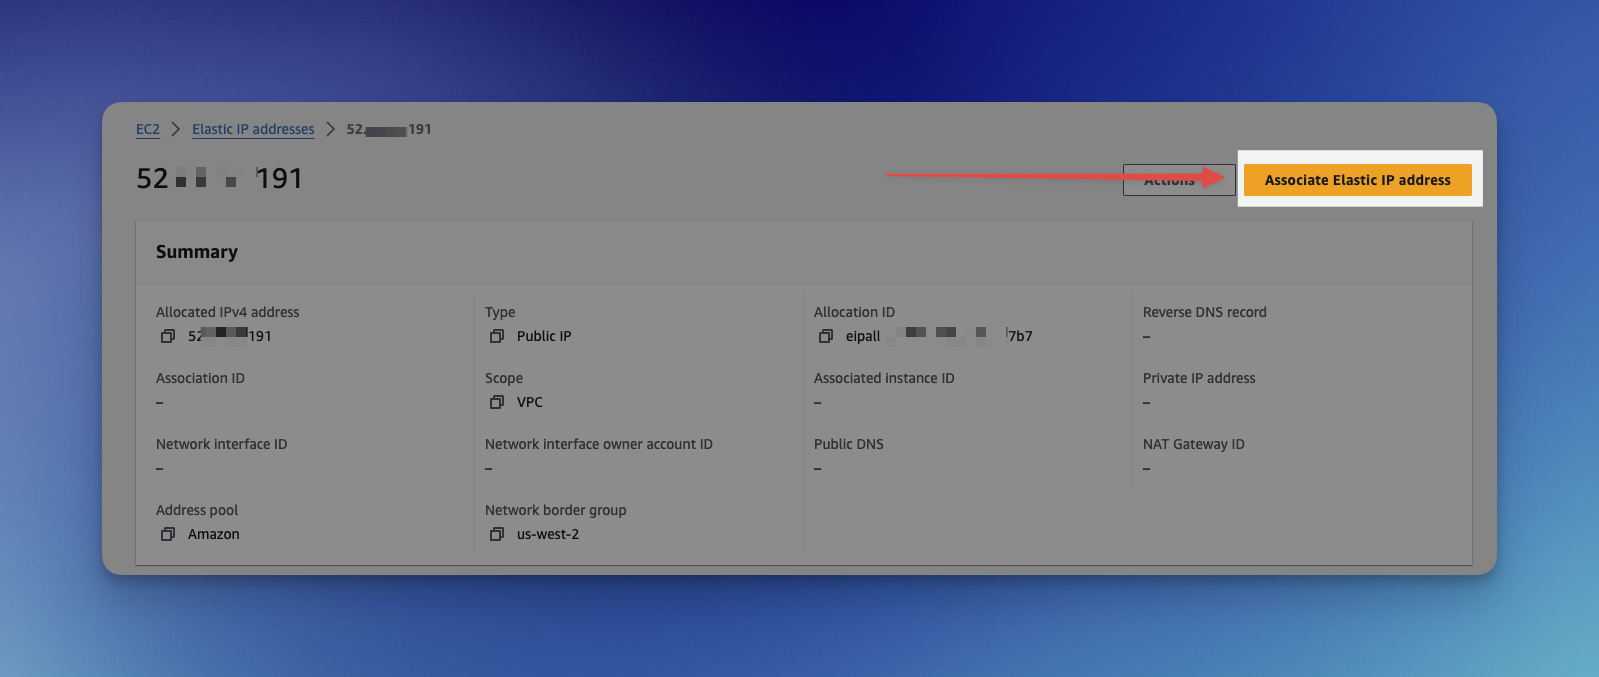
Click on IP address to open the Elastic IP control panel.

Click on “Associate Elastic IP Address” to open the assignment panel
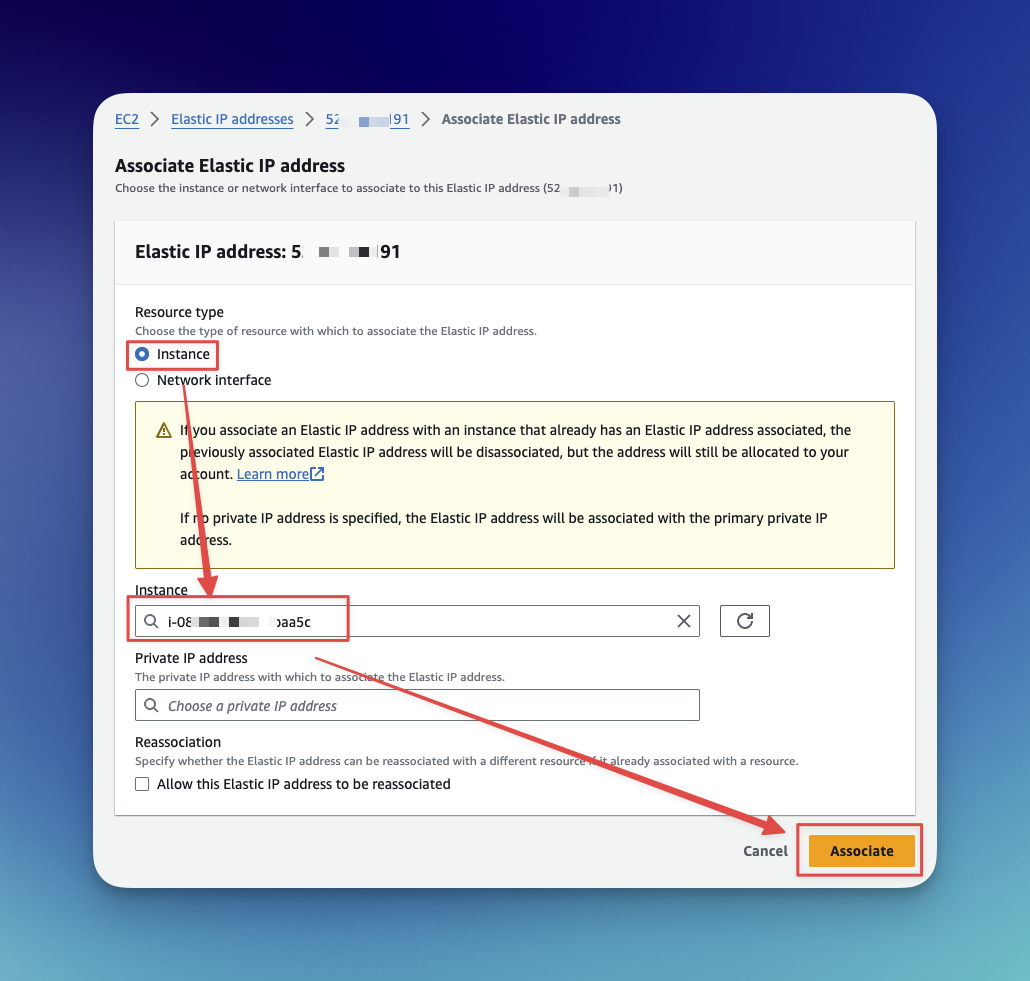
Now choose instance and click associate
We are done. Now lets login into the VPS with SSH.
Continue in part 2 . . .